
Slack is a team collaboration application that has gained a significant amount of momentum over the last 2 years. One of the things that sets Slack apart is the simple and powerful way it can integrate with external applications (Google Drive, Twitter, Trello, or any other app). Using Incoming Webhooks, external apps can automatically post messages to Slack channels when specific events under their control occur.
Business Use Case: Send a direct message in Slack when users created a new lead in Salesforce.
Solution of above business requirement
There are few possible solutions for the above business scenario, but I would like to use Process Builder and Apex to show you the case.
1. Create a Webhook
Incoming Webhooks are a simple way to post messages from external sources into Slack. They make use of normal HTTP requests with a JSON payload. And now we can configure the Salesforce Lead integration.


2. Create the Apex Class for the Slack message Publisher
Each bot has an additional class within Salesforce which contains the end point URL for the chat.postMessage method, you can find that here: https://api.slack.com/methods/chat.postMessage.
In Spring '15 release, a new Apex annotation was introduced. @InvocableMethod Annotation lets us mark an Apex method as being something that can be call from somewhere other than Apex. Thus, we can implement the Apex Class to post the message, and you have to input the Webhook URL created in step 1.
1 2 3 4 5 6 7 8 9 10 11 12 13 14 15 16 17 18 19 20 21 22 23 24 25 26 27 28 29 30 31 32 33 34 35 36 37 38 39 40 41 42 43 | public class SlackSalesforceLeadPublisher {
private static final String slackURL = 'XXXXXXXXXXXXX';
public class LeadRd {
@InvocableVariable(label='Lead Name')
public String LeadName;
}
@InvocableMethod(label='Post to Slack')
public static void postToSlack(List<LeadRd> leads) {
LeadRd ld = leads[0];
Map<String,Object> msg = new Map<String,Object>();
msg.put('text', 'You have a new Lead:\n' + ld.LeadName + '\nPlease follow up.');
msg.put('mrkdwn', true);
String body = JSON.serialize(msg);
System.enqueueJob(new QueueableSlackCall(slackURL, 'POST', body));
}
public class QueueableSlackCall implements System.Queueable, Database.AllowsCallouts {
private final String url;
private final String method;
private final String body;
public QueueableSlackCall(String url, String method, String body) {
this.url = url;
this.method = method;
this.body = body;
}
public void execute(System.QueueableContext ctx) {
HttpRequest req = new HttpRequest();
req.setEndpoint(url);
req.setMethod(method);
req.setBody(body);
Http http = new Http();
HttpResponse res = http.send(req);
}
}
}
|
3. Create the Process in Salesforce Process Builder
To call your apex code, you can directly to use process builder. Follow the below instructions to create a Process.
3.1 Click on Name | Setup | App Setup | Create | Workflows & Approvals | Process Builder
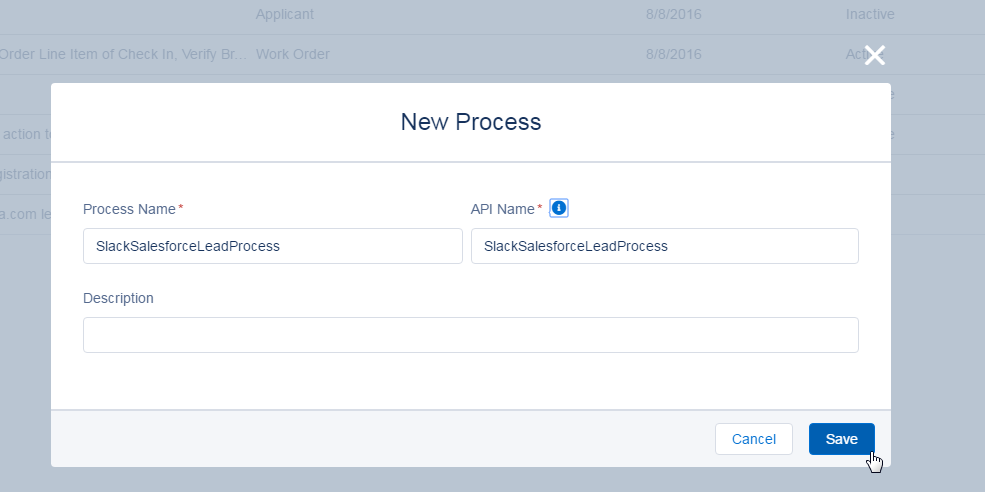
3.2 To create a new process from scratch, click on the New Button available on Process management page. A popup will appear where you have to enter the Name.
3.3 Click on Object node to add object and then select Lead object.
For the entry criteria, Select only when a record is created. Once you’re done click on the Save button

3.4 The next task is to add Process Criteria, To do this click on Add Criteria, enter Name, Type of action and set filter conditions.
In this case we can set "No criteria - just execute the actions!"

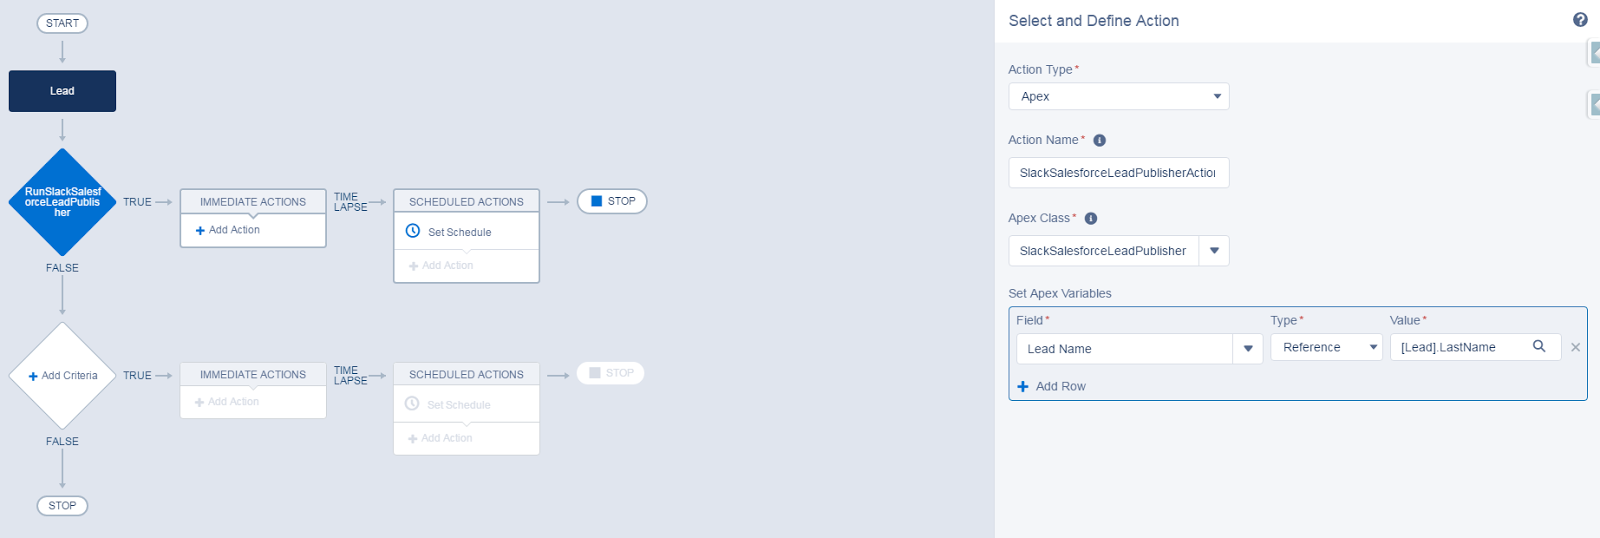
3.5 The next step is to add an Immediate action to Process. Click on Add Action (Under Immediate actions), Select the type of action to create (In our case Apex), and then fill out the fields to define the action.
**Under Apex Class section, It will list out all the classes that contain methods annotated with @InvocableMethod Annotation.
3.6 Once you are done, click on the Save button. And don't forget to active the Process by clicking on the Activate button.
It’s time to test this feature
1. Navigate to the Lead tab, and create the Lead record.

2. You can now see the direct message on Slack!


No comments:
Post a Comment